Beginning with FormulaOne Release 41D, the FormulaOne IDE distribution contains NSIS (Nullsoft Scriptable Install System)
as part of the toolchain.
After creating a standalone executable, the user can now create a setup file which will
allow to redistribute/install his/her own executable on other PCs. The F1 IDE created default setup file creates a single
redistributable file, which will allow a user to install/uninstall the executable, optionally
creating desktop and/or menu shortcuts. The setup program will also install the best fitting
GMP library on the target machine based on the detected CPU.
Note: Internally the F1 IDE creates a NSIS script file based on various project settings.
The script file is subsequently compiled by the NSIS compiler to create the actual redistributable setup file.
Since the IDE generated setup script file is a text file, it provides a good starting point and can be
manually edited if the default setup features are found inadequate.
Please consult the NSIS
web page for detailed instructions.
FomulaOne IDE is distributed with a set of sample programs, including a program "Test Samples".
We will use this program to demonstrate how to create a setup/install program using the F1 IDE toolchain.
This consists of two principal steps:
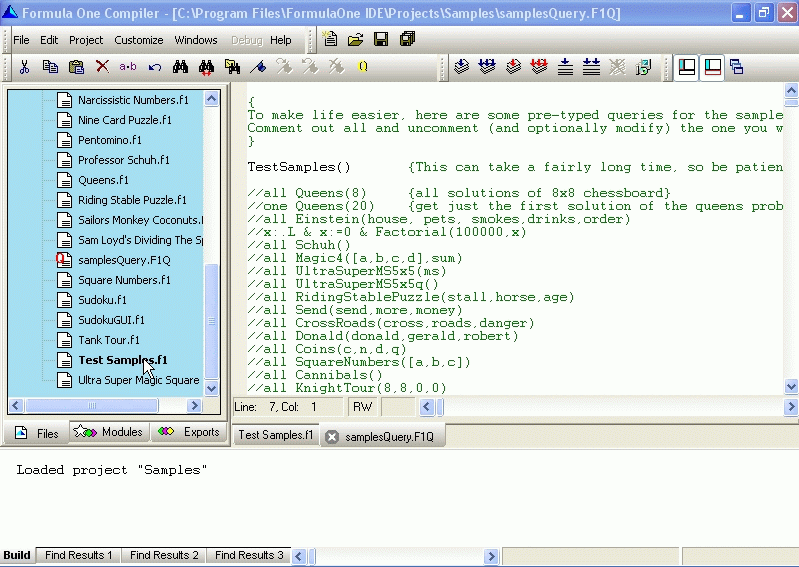
To begin, load and build "Test Samples". Open the file "samplesQuery.F1Q" and make sure the query file "samplesQuery.F1Q" contains the query "TestSamples()".

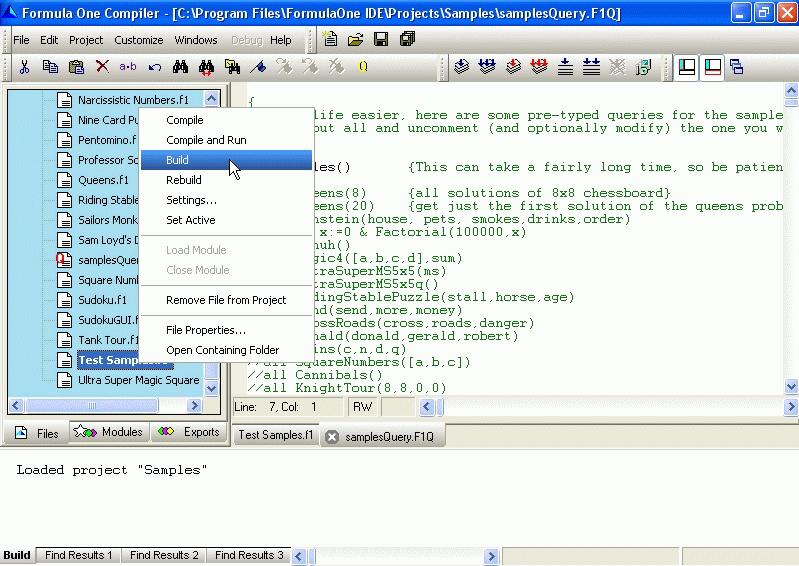
Right-click on "Test Samples" and from the context menu select "Build". This will build the module "Test Samples" itself and any additional modules used by "Test Samples".
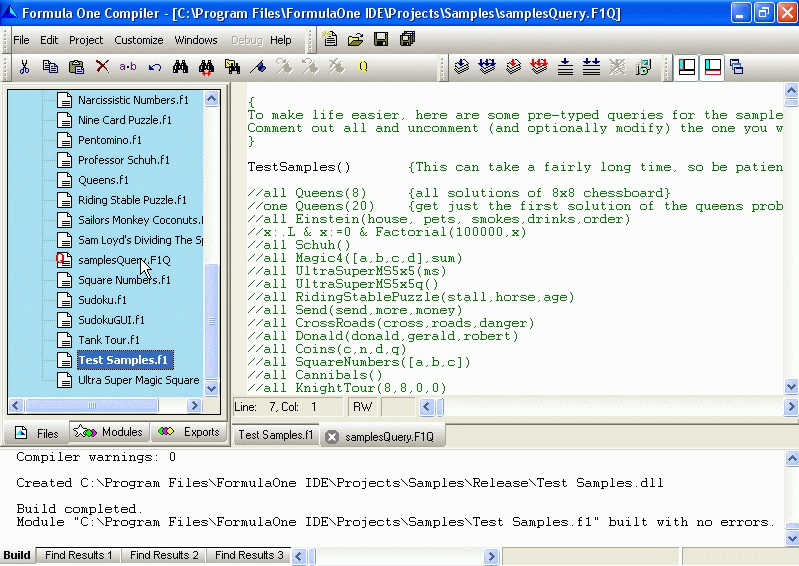
Once all modules are built, check the F1 compiler build output messages for confirmation there were no build errors:
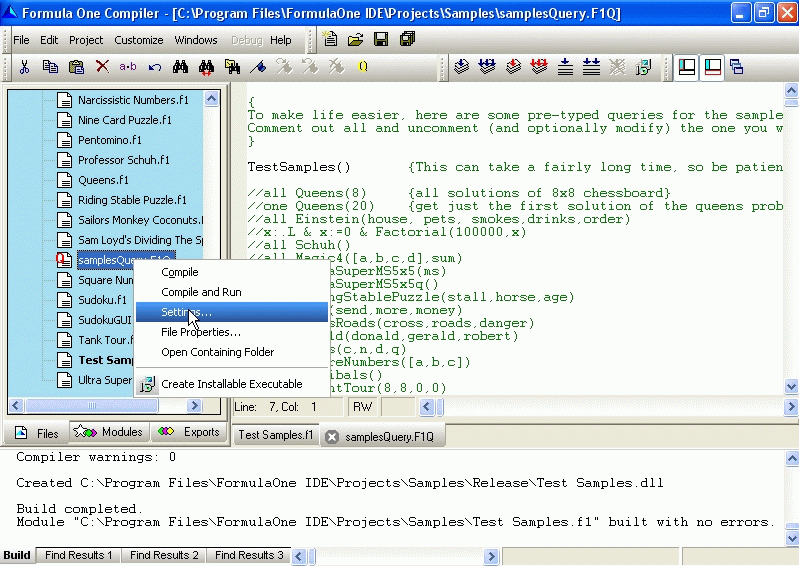
The next step is to create the standalone executable. Right-click on "samplesQuery" and select "Settings...":
Once in the "Project Settings" dialog, select the "Linker" tab and select the option "Create Standalone Executable". You can specify several additional linker options at this time as well.
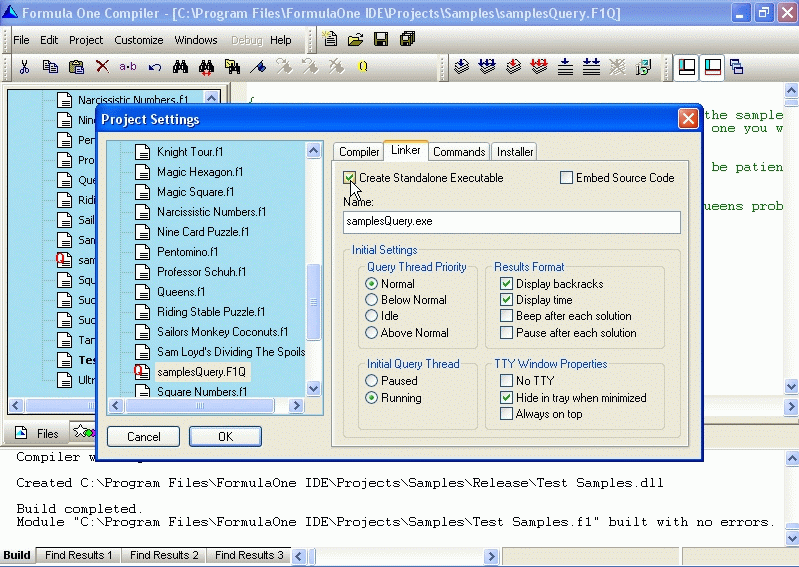
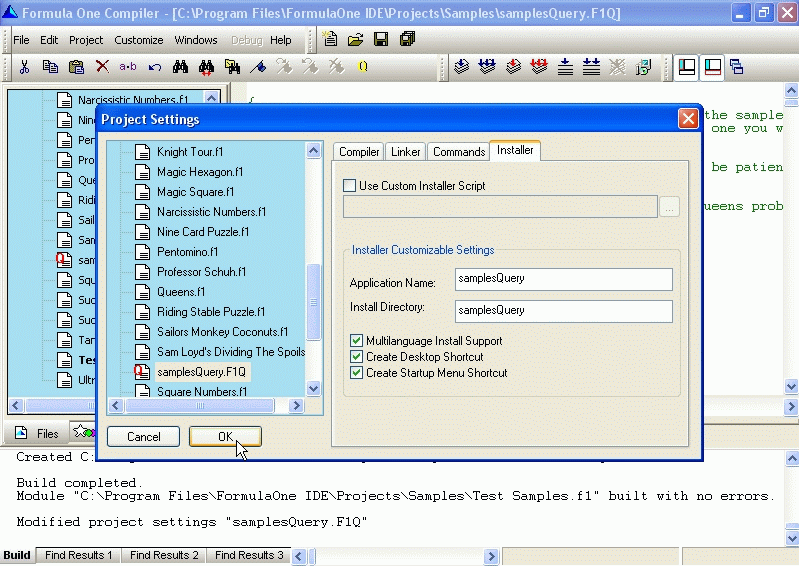
While in the "Project Settings" dialog, you can also view and modify the settings for the installer. We will use the default values, most importantly
we want the F1 IDE to generate the installer script file. For this make sure the check box "Use Custom Installer Script" is deselected.
Click "OK" to apply the new settings.
Note: If the default setup features are found inadequate, you can edit your own "Custom Installer Script".
Please consult the NSIS
web page for detailed instructions.
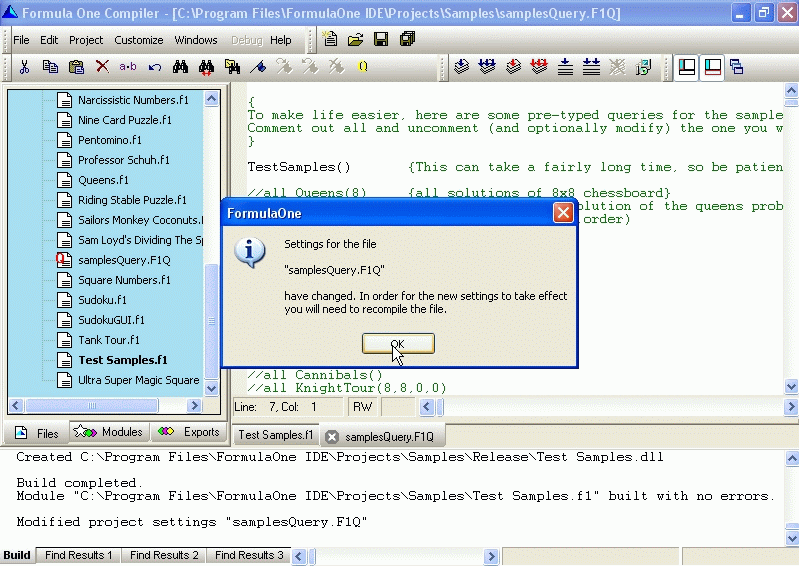
If the F1 IDE detects that linker settings for "samplesQuery" have been changed, you will see a message that "samplesQuery" needs to be recompiled:
To create the standalone executable "samplesQuery.exe", right-click on the query file "samplesQuery.F1Q" and select "Compile":
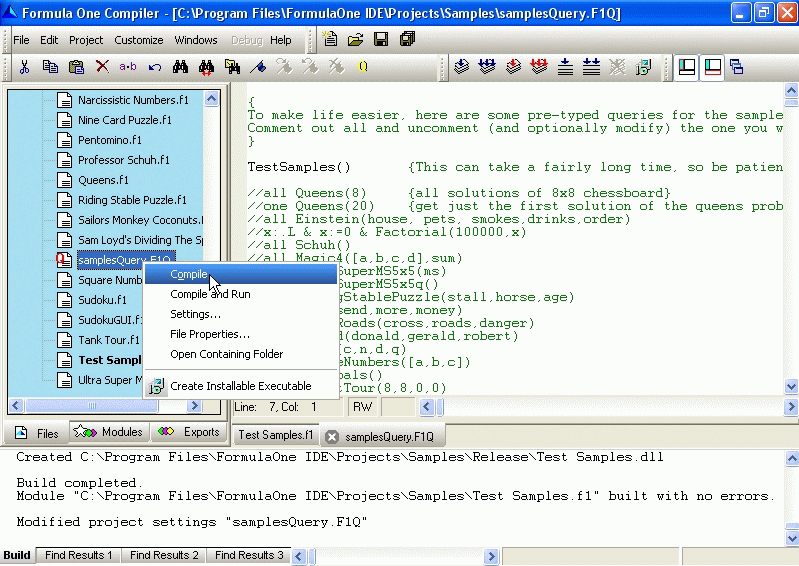
After the project standalone executable file (in our case "samplesQuery.exe") has been successfully created, we can create a setup/install program to to redistribute it to other users. All that is required is a single click Right-click on the query file "samplesQuery.F1Q" and selecting "Create Installable Executable". This will commence the compilation of the setup script by the NSIS compiler.
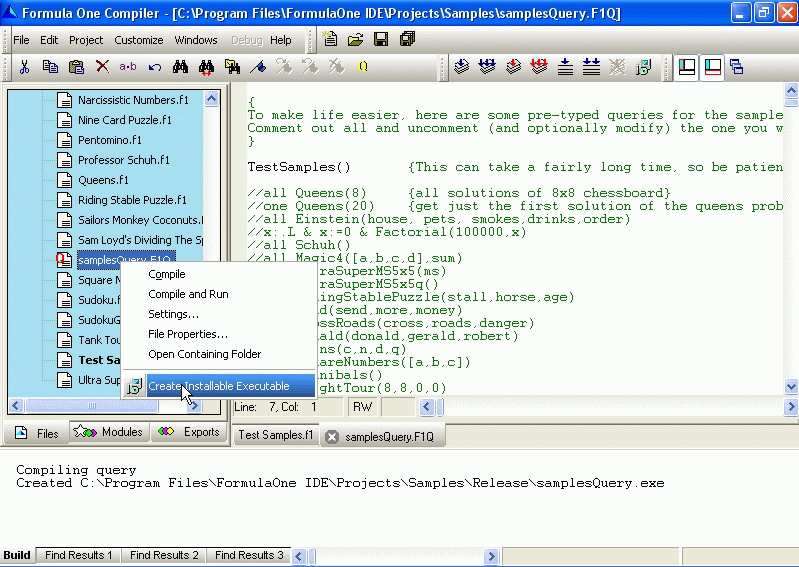
Creating the application setup file can take a little while; you can view the NSIS compiler progress messages in the IDE "Build" pane.
All files that need to be redistributed are compressed. Additionally, all flavors of the GMP libraries built for
various CPUs are compressed and included as well, as we cannot assume any particular target CPU. The proper GMP library
will be chosen automatically at install time based on the detected target CPU.
After the NSIS compiler has finished and no errors were reported, the newly created setup program (in our case
"samplesQuerySetup.exe") will be located in the project "release" directory. You will be also given the opportunity to
test run the setup program on your own machine. This can be done either by
clicking the "Run Setup" button or by running the setup program manually.
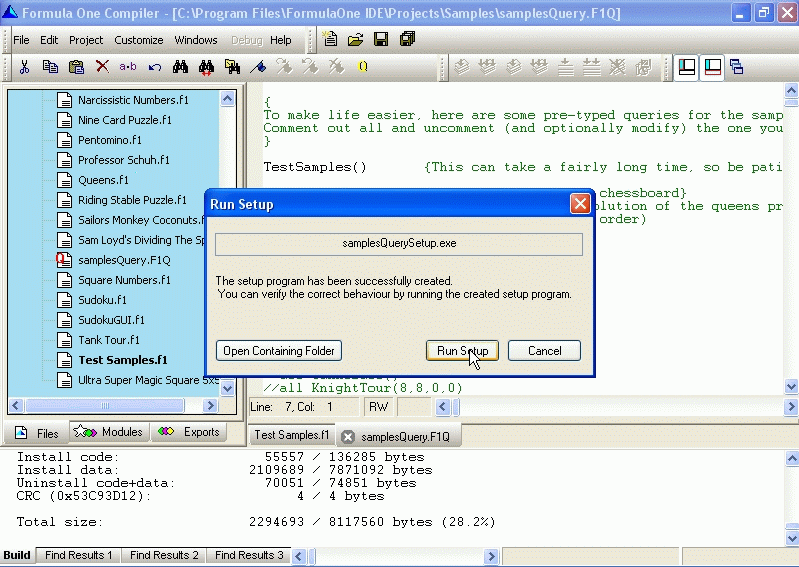
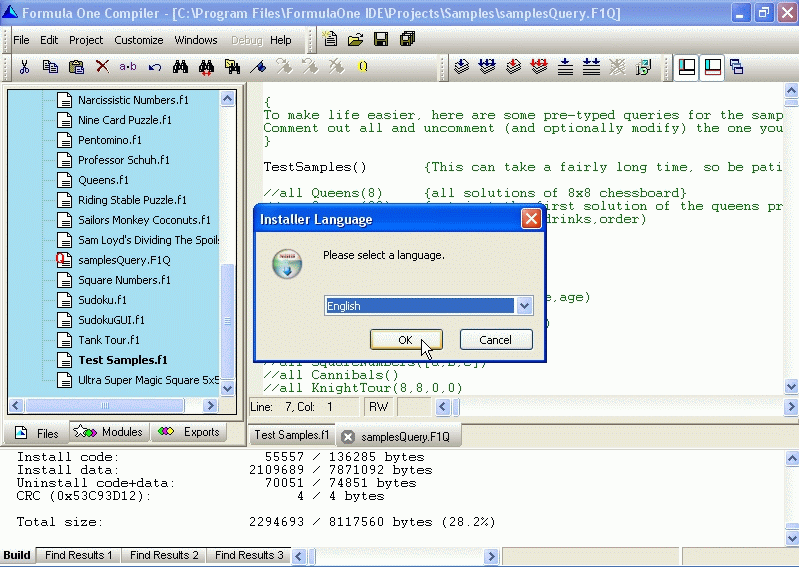
If you chose to test run the setup program on your own machine, the first setup program dialog message will be
typically the one prompting to select the installer language.
Note: This is an optional dialog, and can be excluded by de-selecting the
"Multilanguage Install Support" in the Installer Project Settings.
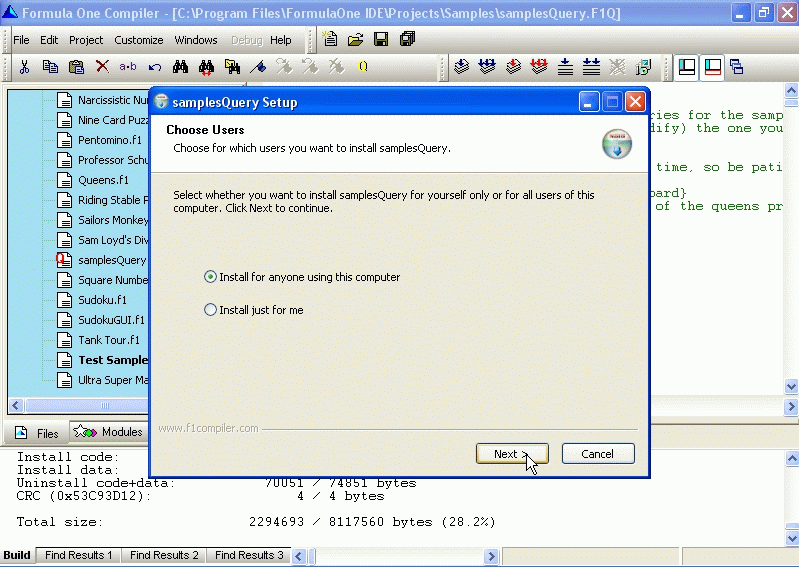
Depending on the operating system, you may or may not see a dialog prompting you to choose a single user or a multi user
installation. This dialog will be not present on systems that do not support multiple users. On systems supporting multiple users
you should be always able to install the application, but to install the application for all users you need to have
the necessary administrative privilege. If you do not have the required privilege, you will be informed by a corresponding dialog message.
Note: The main difference between these two installation methods are the program shortcuts: they either appear for all users or
the current user only.
The destination for the installed application can be selected by the following dialog.
Note: You can modify the suggested initial destination by changing the
"Install Directory" in the Installer Project Settings. However, it will be always a sub-directory of
"Program Files". Of course, at install time the user can chose to install the application elswhere..
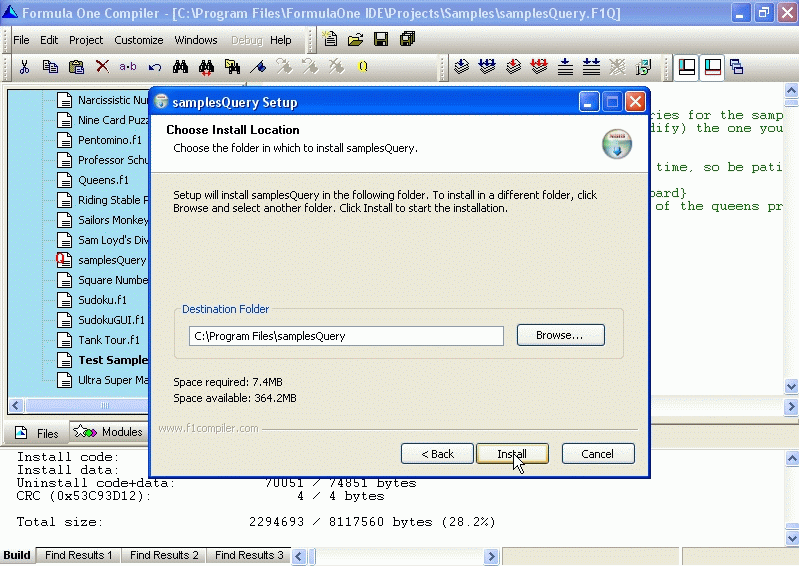
Once the destination has been selected and the user clicked "Next", the actual installation is done. The details can be viewed by selecting "Show details".
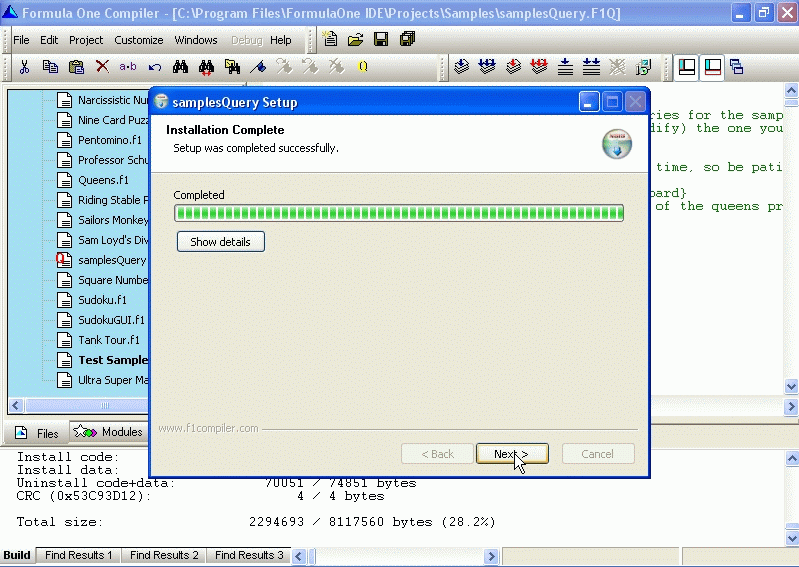
After the installation has been completed, the user will be presented with the final screen, allowing to execute the freshly installed application immediatelly after clicking on the "Finish" button:
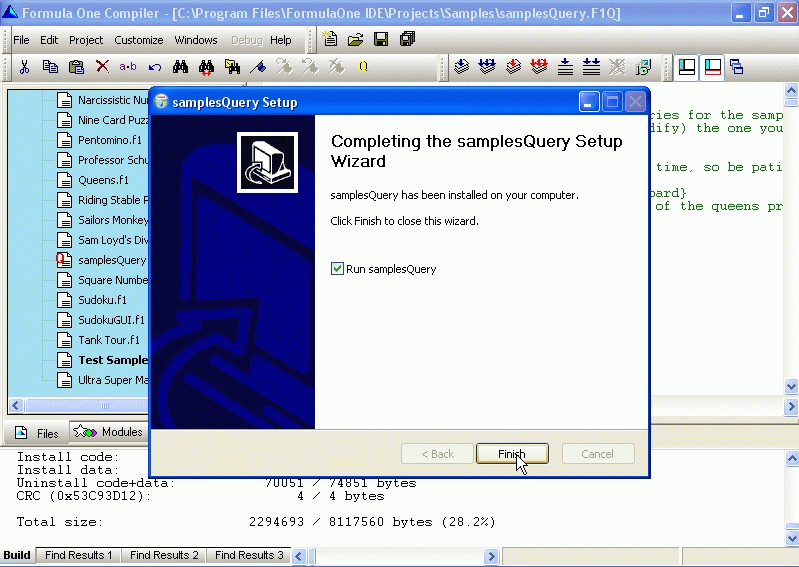
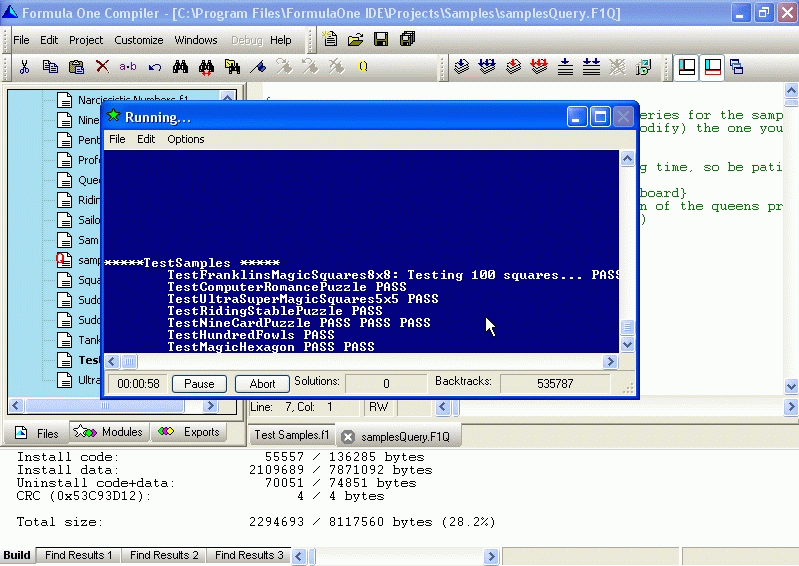
In our case, we should start executing "TestSamples"...
To uninstall the application, the user can either chose Control Panel "Add/Remove Programs" dialog or
uninstall the application by running the "Uninstall" program located in the same directory as the installed application.
Last updated: April 6, 2008